About

Contact

Articles byOlivia

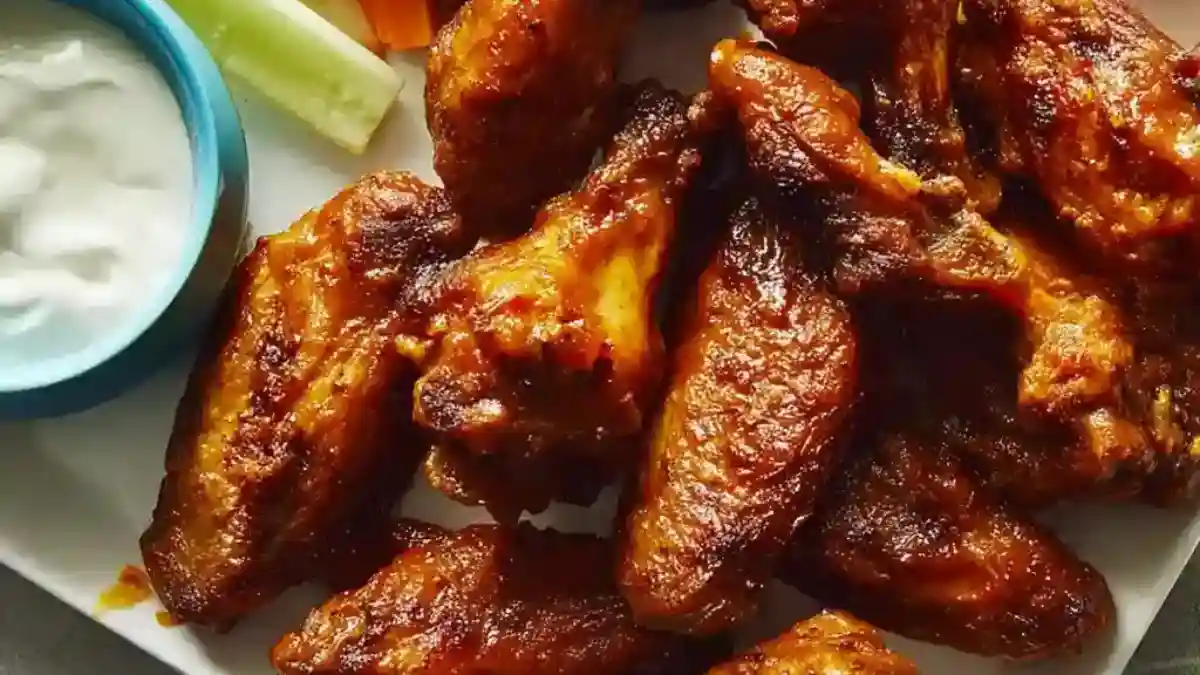
Air-Fryer Buffalo Wings on rustic platter

Air-Fryer Buffalo Wings

There’s just something about the sizzle and spice of Air-Fryer Buffalo Wings that takes me straight back to cozy Sunday nights, football on the screen, and a big platter of wings shared with family. But let’s be honest, deep-frying can be messy, oily, and far from healthy. That’s where my air fryer came to the rescue. Suddenly, I could make irresistibly crispy wings with a fraction of the oil—and none of the guilt. These Air-Fryer Buffalo Wings turned out so flavorful and golden-crisp, they quickly became a weekly tradition.
Ingredients for Air-Fryer Buffalo Wings

If you’ve been hunting for the ultimate wing recipe that’s quick, simple, and absolutely bursting with that spicy, tangy buffalo flavor, this one’s for you. In this guide, I’ll walk you through how to create Air-Fryer Buffalo Wings that are not only easy to make but also healthier than traditional fried versions. Whether it’s game day or a weekday dinner, you’re about to discover a recipe that’s bold, crispy, and packed with real flavor—no deep fryer needed. These wings aren’t just good, they’re better than takeout.

Why You’ll Love This Recipe

Key Benefits

Here’s why these Air-Fryer Buffalo Wings will win you over on the first bite:

  • Crispy texture without deep frying – Golden skin, juicy meat, and no oil splatter.
  • Quick and easy – Ready in under 30 minutes from prep to plate.
  • Healthier than traditional wings – Less oil, fewer calories, all the flavor.
  • Perfect for any occasion – Whether it’s game day or weeknight dinner.
  • Mess-free cooking – No greasy pans or smoke-filled kitchen.
  • Big flavor payoff – Tossed in bold buffalo sauce that sticks beautifully to the skin.

Love easy and flavorful meals? You’ll also enjoy our Air Fryer Chicken Tenders for another crispy fix.

Suitable For

These wings check all the boxes for different diets and preferences:

  • Keto and low-carb – No breading, just seasoned and crisped skin.
  • Gluten-free – Made without flour or breadcrumbs.
  • Dairy-free adaptable – Use a dairy-free hot sauce or skip butter in the buffalo mix.
  • Great for picky eaters – Classic flavors that everyone enjoys.
  • Scales for any crowd – Easy to make a small batch or double it for parties.
Print
clock clock iconcutlery cutlery iconflag flag iconfolder folder iconinstagram instagram iconpinterest pinterest iconfacebook facebook iconprint print iconsquares squares iconheart heart iconheart solid heart solid icon

Air-Fryer Buffalo Wings That Beat Takeout Every Time


  • Author: Olivia
  • Total Time: 35 minutes

Description

Crispy, bold, and ready in 30 minutes, these Air-Fryer Buffalo Wings deliver all the heat and crunch without the mess or guilt of deep frying.


Ingredients

Scale

`2 lbs chicken wings

1 tbsp baking powder

1 tsp salt

1/2 tsp black pepper

1 tsp garlic powder

1/2 cup buffalo sauce

2 tbsp melted butter (optional)


Instructions

Pat wings dry thoroughly with paper towels.

Toss wings with baking powder, salt, pepper, and garlic powder.

Preheat air fryer to 380°F.

Place wings in a single layer in the basket.

Cook at 380°F for 20 minutes, flipping halfway through.

Increase temp to 400°F and cook for another 5–7 minutes.

Toss hot wings in buffalo sauce and melted butter.

Let rest for 2–3 minutes before serving.

Notes

Use baking powder—not baking soda—for best results.

For spicier wings, add cayenne to the seasoning mix.

Wings are best served immediately but can be stored and reheated.

  • Prep Time: 10 minutes
  • Cook Time: 25 minutes
  • Category: Dinner
  • Method: Air Frye
  • Cuisine: American

Ingredients for Air-Fryer Buffalo Wings

Creating the perfect Air-Fryer Buffalo Wings starts with just a handful of everyday ingredients that pack serious flavor. This recipe keeps it simple while offering options to fit your taste or dietary needs.

Core Ingredients

These are the essentials that bring everything together:

  • Chicken wings – Use fresh, split wings (drumettes and flats) for even cooking.
  • Baking powder – Helps create that irresistible crispy skin.
  • Salt and black pepper – A simple but essential seasoning base.
  • Garlic powder – Adds savory depth.
  • Buffalo sauce – Classic Frank’s RedHot works great, or try homemade for custom heat.
  • Butter (optional) – Mix with sauce for extra richness and cling.

Need a plant-based alternative? Swap in cauliflower florets and try our crispy buffalo cauliflower bites—equally bold and satisfying.

Substitutions and Tips

Make it your own with these smart swaps:

  • No butter? Use olive oil or leave it out for a dairy-free version.
  • Want it milder? Stir a little honey or brown sugar into the sauce.
  • No baking powder? Try cornstarch, though it won’t crisp quite as much.
  • No buffalo sauce? Use BBQ, teriyaki, or garlic parmesan for variety.
  • Spice it up – Add cayenne pepper or chili flakes for extra heat.

Best Ingredients for Air-Fryer Buffalo Wings

When making Air-Fryer Buffalo Wings, the quality of your ingredients can make all the difference. Crispiness, flavor, and overall satisfaction all depend on a few key choices that elevate this simple dish into something you’ll want to make again and again.

Why Fresh Ingredients Matter

  • Fresh, not frozen wings – Fresh wings yield better texture and cook more evenly in the air fryer. Frozen wings release moisture that can steam instead of crisp.
  • High-quality buffalo sauce – Choose a buffalo sauce with real cayenne pepper and no added sugar for authentic heat and tang. Frank’s RedHot is a top choice, but homemade gives you total control.
  • Pure baking powder – Make sure it’s aluminum-free for a clean, crisp finish without aftertaste.
  • Fine sea salt and fresh-ground pepper – These basic seasonings highlight the natural flavor of the chicken wings and enhance the sauce.

Looking for more inspiration? Our crispy air fryer garlic wings offer another crowd-pleasing variation with bold, garlicky flavor.

Flavor Boosters to Consider

Take your Air-Fryer Buffalo Wings to the next level with these additions:

  • Smoked paprika – Adds subtle depth and a smoky kick.
  • Worcestershire sauce – A few drops in your buffalo mix add umami.
  • Fresh chopped parsley or green onions – For garnish and a pop of color.
  • Crumbled blue cheese – Optional topping if you’re not dairy-free.

Kitchen Tools You’ll Need

Making Air-Fryer Buffalo Wings is simple, but having the right tools ensures crispy, flavorful results without extra hassle. Whether you’re a seasoned cook or a kitchen newbie, these items will help you nail the recipe every time.

Must-Have Tools

  • Air fryer – Any reliable model will work, but a basket-style air fryer provides better airflow and crispness.
  • Mixing bowl – For tossing wings with seasoning or sauce.
  • Tongs – Essential for flipping wings mid-cook and coating them evenly in sauce.
  • Paper towels – Patting the wings dry before air frying is crucial for that golden, crispy skin.
  • Meat thermometer – Check for doneness (165°F internal temp) without guessing.

If you’re trying different cuts or experimenting with sauces, check out our air fryer chicken tool guide to find the best accessories for your model.

Nice-to-Have Tools

  • Oil sprayer – Helps apply just a light coat of oil to enhance crispness, especially if using skinless cuts.
  • Wire rack – Useful for resting cooked wings so they stay crispy and don’t steam on a plate.
  • Silicone brush – Great for brushing sauce evenly over wings without drowning them.
  • Wing separator or cutter – If you’re prepping whole wings, this tool makes separating drumettes and flats easy.

With these tools on hand, your Air-Fryer Buffalo Wings will cook faster, come out crispier, and be easier to prepare overall. Now, let’s walk through the step-by-step cooking process.

How to Make Air-Fryer Buffalo Wings

Making Air-Fryer Buffalo Wings is fast, fun, and foolproof with this step-by-step method. You’ll get crispy skin, tender meat, and that bold buffalo flavor in every bite—all without a drop of deep-frying oil.

Step-by-Step Instructions

  • Step 1: Dry the wings
    Use paper towels to pat the wings completely dry. This helps the skin crisp up properly in the air fryer.
  • Step 2: Season the wings
    In a bowl, toss the wings with salt, pepper, garlic powder, and 1 tablespoon of baking powder. Make sure every piece is evenly coated.
  • Step 3: Preheat your air fryer
    Set your air fryer to 380°F and let it heat up for 2–3 minutes. A hot air fryer ensures an even cook from the start.
  • Step 4: Arrange the wings
    Place the wings in a single layer in the basket, leaving space between each. Don’t overcrowd or stack.
  • Step 5: Cook in two stages
    Air fry at 380°F for 20 minutes, flipping halfway through. Then raise the temperature to 400°F and cook for another 5–7 minutes for extra crispiness.
  • Step 6: Toss in buffalo sauce
    Remove wings and toss immediately in warm buffalo sauce. Add melted butter if you want a smoother, richer coating.

Love spicy snacks like these? Don’t miss our buffalo cauliflower bites—a veggie-packed alternative with the same bold flavor.

Quick Tips

  • Don’t skip the baking powder—it’s key to that crackly skin.
  • For less mess, toss wings in sauce inside a large bowl with a lid.
  • Let wings rest 2–3 minutes before serving so the sauce sets and the juices settle.

With this foolproof method, your Air-Fryer Buffalo Wings will come out hot, crispy, and smothered in just the right amount of heat. Next, let’s dive into expert tips to make sure they turn out perfect every time.

Tips for Success

Perfecting Air-Fryer Buffalo Wings isn’t just about following the steps—it’s about mastering a few smart habits that make your wings consistently crisp, juicy, and packed with flavor. These expert tips will take your wing game from good to unbelievable.

  • Always pat wings dry
    Moisture is the enemy of crisp skin. Use paper towels to dry thoroughly before seasoning.
  • Use baking powder, not baking soda
    Baking powder helps the skin blister and crisp in the air fryer. Baking soda will make it bitter—don’t confuse them.
  • Preheat the air fryer
    A hot fryer seals in moisture and kick-starts that golden texture.
  • Cook in a single layer
    Overcrowding = steaming. Space out the wings so air can circulate for even browning.
  • Flip halfway through
    This ensures both sides of your Air-Fryer Buffalo Wings get crispy.

Looking to pair your wings with the perfect side? Try our air fryer zucchini fries for a healthy, crunchy combo.

Flavor and Finishing Touches

  • Toss wings in sauce after cooking
    Coating them too early can make the skin soggy. Wait until they’re hot and crispy.
  • Warm your buffalo sauce
    A quick zap in the microwave helps it coat wings evenly and stick better.
  • Add butter for richness
    Stir melted butter into your hot sauce if you want that classic restaurant-style gloss.
  • Let them rest before serving
    Give your wings 2–3 minutes to set after tossing in sauce. It locks in the flavor and makes them easier to handle.

These quick tips ensure your Air-Fryer Buffalo Wings always come out bold, crispy, and crave-worthy. Now let’s cover how to store them so none of that flavor goes to waste.

How to Store Air-Fryer Buffalo Wings

Whether you made a big batch for a party or just have leftovers from dinner, storing your Air-Fryer Buffalo Wings the right way keeps them tasty and crispy for days. Here’s how to do it step by step.

At Room Temperature

  • Time limit: Wings should never sit out for more than 2 hours at room temperature. Bacteria can grow quickly beyond that.
  • Serving tip: If keeping them out for a short gathering, loosely cover with foil to retain some heat without trapping steam.

In the Refrigerator

  • Storage method: Place cooled Air-Fryer Buffalo Wings in an airtight container or wrap them tightly in foil or plastic wrap.
  • Shelf life: They’ll stay fresh for up to 4 days in the fridge.
  • Reheating tip: Reheat in the air fryer at 375°F for 4–6 minutes. This brings back the crispiness without drying them out.

Craving something to pair with your leftovers? Try our creamy ranch dip recipe—the perfect cool contrast to spicy wings.

Freezing Tips

  • Freeze before saucing: For best texture, freeze wings plain, then add sauce after reheating.
  • Wrap properly: Lay wings on a tray to freeze individually first, then transfer to a freezer-safe bag or container.
  • Label and date: Wings will keep well for up to 3 months.
  • Reheat from frozen: Cook straight from the freezer in the air fryer at 375°F for 12–15 minutes, flipping once halfway through.

These simple storage tips keep your Air-Fryer Buffalo Wings flavorful, crispy, and ready to enjoy anytime. Next up, let’s tackle some commonly asked questions to help you customize and troubleshoot with ease.

Conclusion

If you’re looking for the perfect blend of convenience, crispiness, and bold flavor, Air-Fryer Buffalo Wings are the answer. This recipe takes everything you love about classic buffalo wings and transforms it into a healthier, faster, and easier version—without sacrificing an ounce of flavor. With just a few simple ingredients and some smart kitchen tips, you can make wings that beat takeout right in your own home.

Whether you’re serving them up for game night, a weeknight dinner, or a party appetizer, these wings are guaranteed to be a hit. Plus, with flexible storage options and the ability to pair them with everything from zucchini fritters to cauliflower bites, they’re as versatile as they are delicious.

Thanks for cooking with me! Don’t forget to Check out more tips on Pinterest or follow on Facebook.

FAQs About Air-Fryer Buffalo Wings and Zucchini Fritters

Whether you’re experimenting with air fryer recipes or dealing with dietary restrictions, these common questions will help you get the most out of both Air-Fryer Buffalo Wings and other crispy favorites like zucchini fritters.

1. Can I make zucchini fritters in the air fryer without flour?

Yes, you can skip flour entirely for a lower-carb or gluten-free version. Just make sure to drain the zucchini well and use a binding agent like egg or flaxseed meal to hold everything together. Almond flour is another great substitute if you want to add structure.

2. What’s the best air fryer recipe for zucchini fritters?

The best recipes use grated zucchini, egg, seasoning, and a small amount of flour or breadcrumbs. A little parmesan or feta adds flavor and helps the fritters crisp up nicely. Air fry at 375°F for 10–12 minutes, flipping halfway. Check out our Greek zucchini fritters for a savory option with herbs and cheese.

3. Are there Greek zucchini fritters I can make in the air fryer?

Absolutely. Known as “kolokithokeftedes,” these fritters include zucchini, fresh dill, mint, scallions, and feta. You can easily shape them into small patties, spray lightly with oil, and air fry for a golden, crunchy exterior. Serve them with tzatziki or lemon yogurt sauce for a Mediterranean twist.

4. Can I make zucchini fritters in the air fryer without egg?

Yes. To replace the egg, use 1 tablespoon ground flaxseed mixed with 2.5 tablespoons water and let it sit for a few minutes. This mixture acts as a binder. You can also use mashed potatoes or cooked quinoa to help the fritters hold their shape.

5. Are there air fryer zucchini fritters without cheese?

Yes. Just leave the cheese out and increase the herbs or add garlic and onion for more flavor. Nutritional yeast is another good alternative if you want that savory, cheesy taste without using dairy.

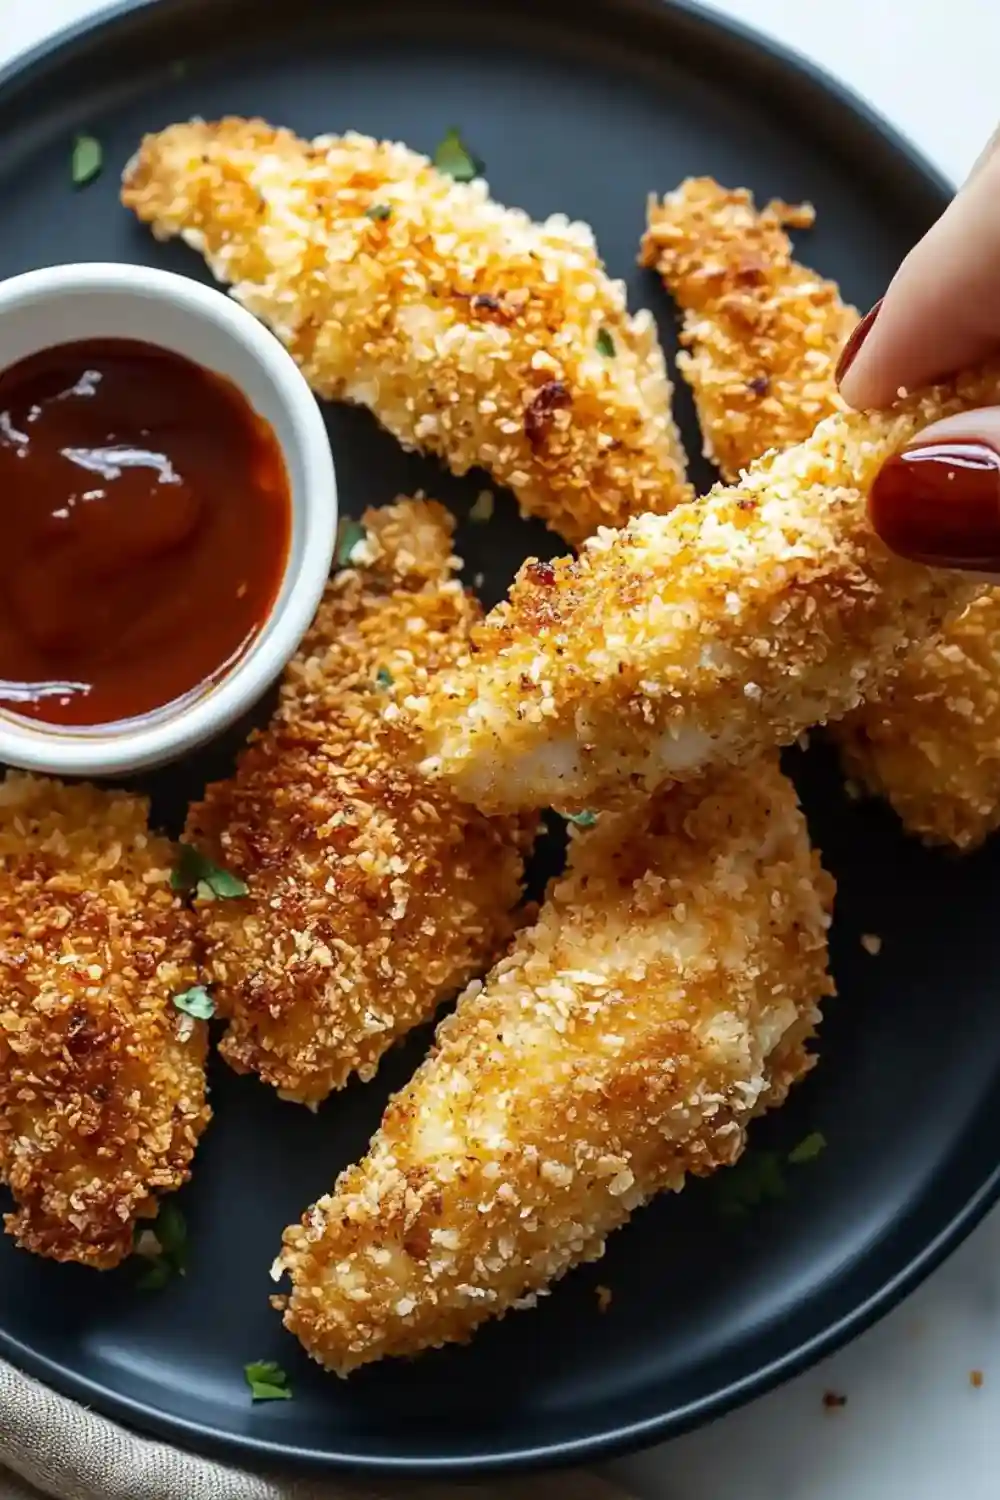
Air Fryer Chicken Tenders Served with Dipping Sauce

Air Fryer Chicken Tenders

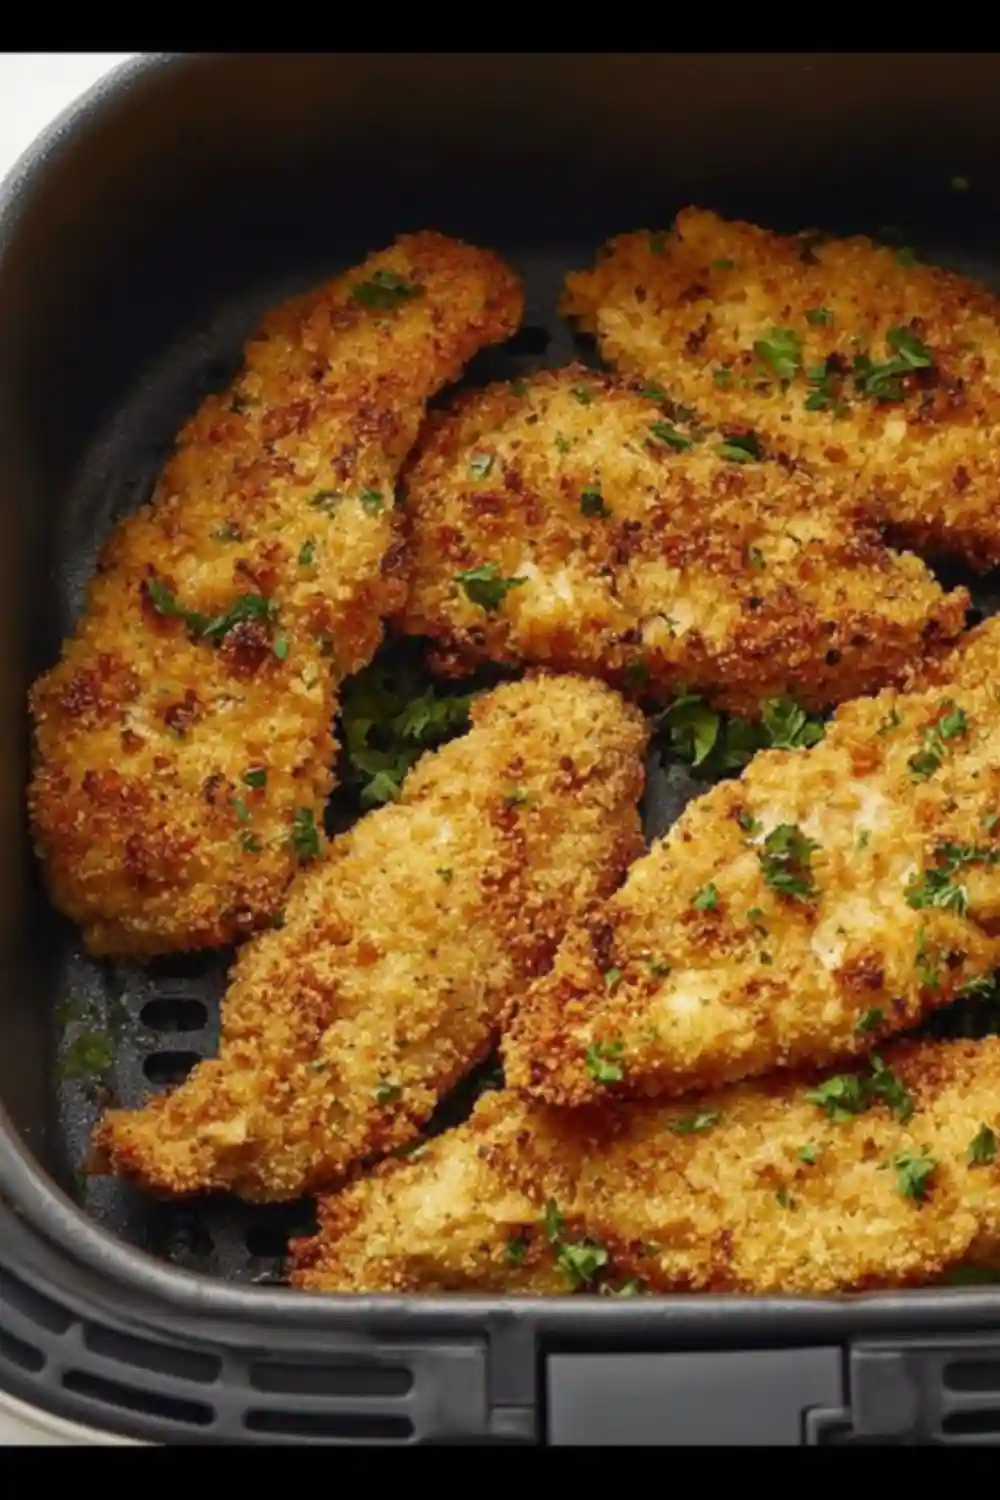
here’s something so satisfying about crunchy chicken without the mess of deep frying. That’s exactly why these Air Fryer Chicken Tenders have quickly become a staple in my kitchen. I’ve been on a roll testing air fryer recipes lately, and after nailing the perfect nuggets, I knew tenders were next. They came out golden-brown with a crispy, seasoned coating and juicy center that tasted fresher than anything from the freezer aisle.

Ingredients for Air Fryer Chicken Tenders

What I love most is how this recipe uses simple ingredients like panko, Italian seasoning, and garlic powder to create big flavor. Whether you’re whipping these up for a quick family dinner or serving them as a game-day snack, air fryer chicken tenders are a deliciously easy win. Oh, and did I mention they’re ready in under 25 minutes?

Why You’ll Love This Air Fryer Chicken Tenders Recipe

Key Benefits

These chicken tenders are:

  • Crispy exterior, juicy interior—all without using a deep fryer.
  • Lower in fat than traditional fried chicken thanks to air frying
  • Quick to prep and cook—just 10 minutes to prep, 13 to cook
  • Freezer-friendly and reheat beautifully for meal prep
  • Kid-friendly and picky-eater approved
  • Easily tailored with your go-to spices or dipping sauces.

You’ll appreciate how much better these Air Fryer Chicken Tenders taste compared to store-bought frozen versions. The blend of regular and panko breadcrumbs creates an irresistible crunch, while garlic powder, smoked paprika, and Italian seasoning add bold, savory depth. Serve them with homemade honey mustard or tangy BBQ sauce, and you’ve got a quick, satisfying meal that feels restaurant-worthy—without the hassle.

Suitable For

These tenders are ideal for:

  • Busy families needing a weeknight dinner idea
  • Anyone craving healthier comfort food options
  • Meal preppers who want a high-protein, versatile dish
  • Entertaining friends or game-day snacks
  • Budget-conscious cooks—this whole recipe costs under $8

They’re also perfect for those avoiding pork or alcohol in their meals, since the recipe is clean, wholesome, and full of flavor from simple pantry ingredients. Looking for a great side? They’re amazing next to this air fryer broccoli or a hearty homemade pasta salad.

Print
clock clock iconcutlery cutlery iconflag flag iconfolder folder iconinstagram instagram iconpinterest pinterest iconfacebook facebook iconprint print iconsquares squares iconheart heart iconheart solid heart solid icon
Air Fryer Chicken Tenders Served with Dipping Sauce

Air Fryer Chicken Tenders Crispy and Healthy in Just 13 Minutes


  • Author: Olivia
  • Total Time: 23 minutes
  • Yield: 4 servings (2 tenders each) 1x
  • Diet: Low Fat

Description

Crispy, juicy, and easy to make, these Air Fryer Chicken Tenders are perfect for a quick lunch or family dinner. Healthier than fried, they’re made with simple pantry ingredients and ready in under 25 minutes.


Ingredients

Scale
  • 8 boneless, skinless chicken breast tenders (about 1.25 lb)
  • 1½ tsp salt, divided
  • 1 tsp freshly cracked black pepper, divided
  • 2 tbsp all-purpose flour
  • 2 large eggs
  • ½ cup plain regular breadcrumbs
  • ½ cup plain panko breadcrumbs
  • 1 tsp Italian seasoning
  • 1¼ tsp garlic powder
  • 1 tsp onion powder
  • ½ tsp smoked paprika

Instructions

  • 1. Place the chicken tenders on a cutting board. Season with ½ tsp salt and ½ tsp black pepper. Sprinkle flour and toss to coat.
  • 2. Whisk eggs in a shallow bowl. In another bowl, combine both breadcrumbs, remaining seasonings, salt, and pepper.
  • 3. Dip each tender into the egg, then coat with breadcrumbs. Press breadcrumbs in for even coverage.
  • 4. Preheat air fryer to 400°F. Place tenders in a single layer. Spray tops with oil spray.
  • 5. Air fry for 7 minutes. Flip, spray again, and cook another 6 minutes.
  • 6. Remove, let cool 3–5 minutes, and serve with your favorite dipping sauce.

Notes

  • You can cut chicken breasts lengthwise if you don’t have pre-cut tenders.
  • Use buttermilk instead of eggs for a tangier flavor.
  • Store leftovers in an airtight container for up to 4 days. Reheat in the air fryer for best texture.
  • Prep Time: 10 minutes
  • Cook Time: 13 minutes
  • Category: Dinner
  • Method: Air Fryer
  • Cuisine: American

Nutrition

  • Serving Size: 2 tenders
  • Calories: 254
  • Sugar: 0g
  • Sodium: 1179mg
  • Fat: 6g
  • Saturated Fat: 1g
  • Unsaturated Fat: 4g
  • Trans Fat: 0g
  • Carbohydrates: 20g
  • Fiber: 2g
  • Protein: 28g
  • Cholesterol: 110mg

Ingredients for Air Fryer Chicken Tenders

Core Ingredients

To make the best air fryer chicken tenders, you’ll need a few simple, affordable staples. Here’s everything that goes into creating that crispy, juicy texture and savory flavor:

  • 8 boneless, skinless chicken breast tenders (about 1.25 lbs) – Already pre-cut or sliced from whole breasts
  • 1½ tsp salt, divided – Helps flavor both the meat and the coating
  • 1 tsp freshly cracked black pepper, divided – Infuses a punch of bold flavor.
  • 2 tbsp all-purpose flour – Ensures the egg sticks perfectly to the chicken
  • 2 large eggs – Works as the binding layer between the chicken and breadcrumbs
  • ½ cup plain regular breadcrumbs – For a fine, even layer
  • ½ cup plain panko breadcrumbs – Gives that signature crunchy bite
  • 1 tsp Italian seasoning – A mix of herbs for a flavorful base
  • 1¼ tsp garlic powder – Adds rich, savory depth
  • 1 tsp onion powder – Boosts the overall flavor
  • ½ tsp smoked paprika – For color and subtle smokiness

Every ingredient in these Air Fryer Chicken Tenders works together to create the perfect balance of texture and flavor. The combination of regular and panko breadcrumbs delivers that golden, crispy coating you’d expect from restaurant-style tenders—without the need for deep frying.

If you haven’t used panko before, it’s a Japanese-style breadcrumb that’s lighter and crispier than traditional varieties. It’s the key to achieving that signature crunch that makes air-fried tenders so addictive.

Substitutions and Tips

  • Chicken Options: Can’t find pre-cut tenders? Simply slice boneless, skinless chicken breasts lengthwise into strips.
  • Egg Swap: Try buttermilk instead of eggs for a tangier flavor and extra moisture, like we did in our air fryer chicken nuggets.
  • Breadcrumbs: Gluten-free? Use your favorite gluten-free panko or ground rice crackers.
  • Seasoning Variations: Add cayenne for heat, or swap Italian seasoning for Cajun or ranch mix.
  • No-Spray Oil Alternative: Brush with a little avocado oil instead of using spray if preferred.

Kitchen Tools You’ll Need for Air Fryer Chicken Tenders

Must-Have Tools

To make these crispy air fryer chicken tenders without fuss or mess, you only need a few basic kitchen tools:

  • Air Fryer – Essential, of course! Any model will do, but one with a wide basket allows you to cook more tenders per batch. Look for one that goes up to 400°F for optimal crispiness.
  • Mixing Bowls – You’ll need at least two shallow bowls: one for the eggs and one for the seasoned breadcrumb mix. Wider bowls make breading easier and less messy.
  • Tongs – These help you dip the tenders without getting sticky fingers, and they’re great for flipping mid-cook.
  • Cutting Board – A sturdy board gives you space to season and flour your chicken tenders.
  • Whisk or Fork – Use this to whisk the eggs into a smooth consistency

These few items will cover the full process from prep to air frying without crowding your kitchen.

Nice-to-Have Tools

While not absolutely necessary, these extras can make your cooking experience even smoother:

  • Oil Spray Bottle – A refillable mister filled with avocado or olive oil helps you control how much oil goes on each tender and ensures they crisp up beautifully.
  • Cooling Rack – Placing the finished tenders on a wire rack helps them stay crisp as they cool slightly before serving.
  • Food Thermometer – For peace of mind, especially if you’re cooking larger tenders. The internal temperature should reach 165°F.
  • Parchment Paper Liner (for air fryer use only): Helps prevent sticking and reduces cleanup time—just be sure it’s air-fryer safe and perforated.

How to Make Air Fryer Chicken Tenders

Making homemade chicken tenders in the air fryer is surprisingly easy—and so rewarding. With just a few steps, you’ll have hot, crispy tenders on your plate in under 25 minutes.

Breaded Chicken Tenders Ready to Air Fry

Step 1: Season and Flour the Chicken
Arrange 8 chicken breast tenderloins on a cutting board and season both sides with ½ tsp salt and ½ tsp cracked black pepper. Lightly dust with 2 tbsp of all-purpose flour, tossing to coat evenly—this helps the egg wash adhere more effectively.

Step 2: Prep the Dredging Station
In one shallow bowl, whisk 2 large eggs until fully beaten. In another, mix together:

  • ½ cup regular breadcrumbs
  • ½ cup panko breadcrumbs
  • 1 tsp salt
  • ½ tsp black pepper
  • 1 tsp Italian seasoning
  • 1¼ tsp garlic powder
  • 1 tsp onion powder
  • ½ tsp smoked paprika

This breadcrumb mix gives the tenders their irresistible crunch and bold flavor.

Step 3: Bread the Tenders
Using tongs or your hands, dip each floured chicken tender into the egg mixture, making sure it’s fully coated. Then press both sides into the breadcrumb mixture, patting it in to ensure an even crust. Set aside on a clean plate or cutting board.

Step 4: Air Fry the Chicken
Preheat your air fryer to 400°F. Arrange 4 tenders in the basket in a single layer, making sure they don’t overlap.Spray the tops with cooking spray. Air fry for 7 minutes.

Step 5: Flip and Finish
Flip the tenders, spray again, and cook another 6 minutes until golden brown and the internal temperature hits 165°F. Remove and repeat with the second batch.

  • Dry chicken = better coating
    Dry the chicken with paper towels before seasoning to help the flour and egg mixture adhere better, resulting in crispier tenders.
  • Use both breadcrumbs
    The mix of fine regular breadcrumbs and airy panko gives you that unbeatable crunch. Don’t skip one or the other—they work best together.
  • Press the coating in
    Don’t just lightly dredge—use your hands or tongs to press the breadcrumb mix firmly into the tenders for a thick, even coating that won’t fall off during cooking.
  • Preheat your air fryer
    Always preheat to 400°F before adding the tenders. This jump-starts the crisping and prevents sogginess.
  • Don’t overcrowd the basket
    Cook in batches so hot air can circulate evenly. Overlapping pieces can lead to uneven cooking or soggy spots.

Air Fryer Chicken Tenders Cooking and Serving Tips

  • Flip halfway through
    This ensures even browning and maximum crispiness on both sides. Use tongs or a spatula to flip gently.
  • Spray with oil
    Spraying the tops of the tenders before and after flipping helps them turn golden without deep frying.
  • Rest before serving
    Allow the tenders to rest for 3–5 minutes on a rack or plate before serving. This helps the coating firm up and the juices settle inside the chicken.
  • Serve with variety
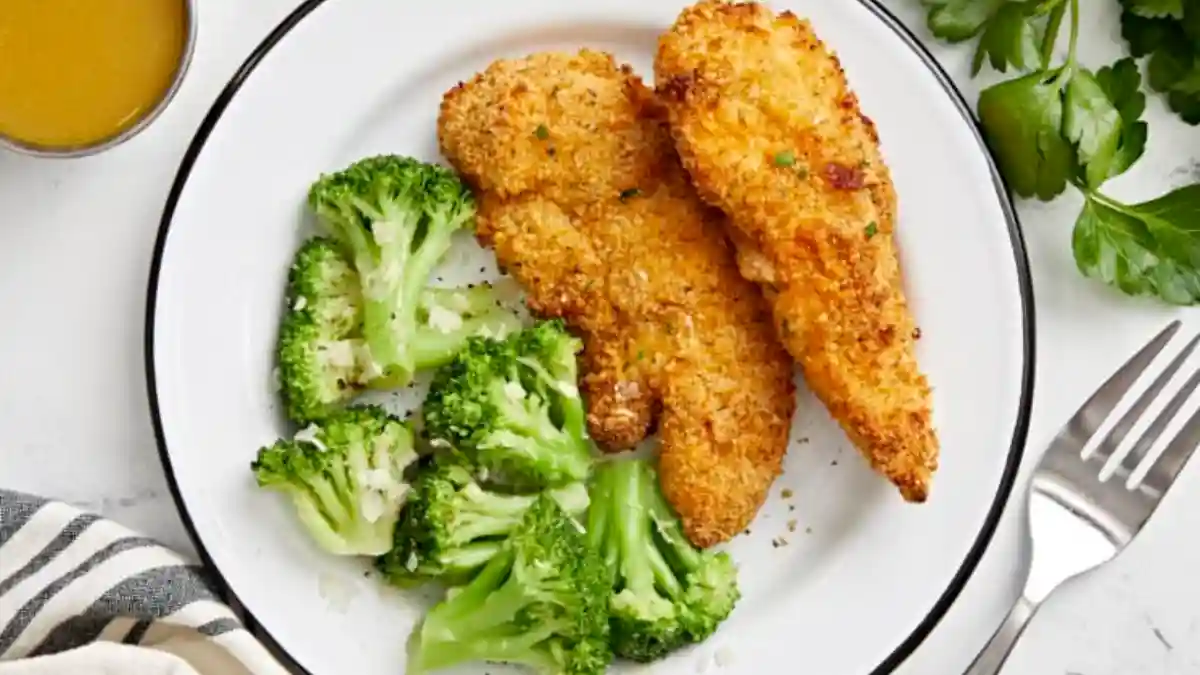
    These tenders pair perfectly with dips like honey mustard or BBQ sauce, and go great alongside mashed potatoes or steamed broccoli.

With these tips, you’ll master air frying and avoid the biggest rookie mistake: soggy tenders. Follow these tricks and enjoy restaurant-quality results straight from your own kitchen.

Air Fryer Chicken Tenders with Side Dishes

How to Store Air Fryer Chicken Tenders

Whether you’re planning ahead for meal prep or saving leftovers, these air fryer chicken tenders store well and reheat beautifully. Follow these simple storage tips to keep them crispy and delicious.

At Room Temperature

Air fryer chicken tenders should only be left out at room temperature for no more than 2 hours. After that, they risk entering the food safety danger zone. If you’re serving them buffet-style or packing for lunch, consider using an insulated container to help maintain temperature.

In the Refrigerator

To store in the fridge:

  • Let the chicken tenders cool completely before storing.
  • Place them in an airtight container or wrap them snugly in foil.
  • Refrigerate for up to 4 days.

When ready to eat, reheat in the air fryer at 350°F for 4–5 minutes until warmed through and crispy again. You can also use a toaster oven, but avoid microwaving—this can make the coating soggy.

Check out more tips on Pinterest or follow on Facebook.

Freezing Tips

Want to freeze for future meals? No problem.

To freeze:

  • Once cooled, arrange the tenders in a single layer on a baking sheet.
  • Freeze for about 2 hours until solid, then move them to a freezer-safe bag or container.
  • Label with the date. Store for up to 3 months.

To reheat from frozen:

  • No need to thaw.
  • Preheat air fryer to 375°F.
  • Cook for 10–12 minutes, flipping halfway, until crispy and heated through.

Conclusion for Air Fryer Chicken Tenders recipe

These Air Fryer Chicken Tenders prove you don’t need a deep fryer—or a long list of ingredients—to enjoy a crispy, flavorful meal that hits the spot. They’re quicker, healthier, and way more satisfying than anything in the freezer aisle. Thanks to the perfect blend of breadcrumbs and spices, every bite delivers that golden crunch and juicy tenderness you crave.

Whether you’re serving Air Fryer Chicken Tenders with a zesty dipping sauce, pairing them with roasted veggies, or tossing them into a salad or wrap, this recipe is one you’ll reach for again and again. It’s perfect for family dinners, easy lunches, or game day bites everyone will love.

So fire up your air fryer and enjoy homemade Air Fryer Chicken Tenders that are crunchy, wholesome, and bursting with flavor. Loved this recipe? Be sure to explore our other air fryer favorites and discover even more ways to upgrade your chicken night.

FAQs About Air Fryer Chicken Tenders

Can I put raw chicken in the air fryer?
Yes, absolutely. Raw chicken cooks perfectly in the air fryer as long as it’s cooked to an internal temperature of 165°F. Preheat the air fryer and keep the basket uncrowded to ensure even cooking.

How long should you cook chicken in an air fryer?
Chicken tenders cook in about 13 minutes total at 400°F—7 minutes on one side, then 6 more after flipping. Cooking time may vary slightly depending on thickness.

Are air fried chicken tenders unhealthy?
Not at all. Air frying uses significantly less oil than deep frying, making these tenders lower in fat and calories. Plus, you control the ingredients—no additives or preservatives.

What temperature do you cook raw chicken tenders?
Set your air fryer to 400°F. This high heat helps create a crispy coating while cooking the inside to juicy perfection.

How do you make chicken crispy in the air fryer?
Use a mix of regular and panko breadcrumbs, lightly spray with cooking oil, and don’t overcrowd the basket. Flipping halfway through also helps both sides get golden and crunchy.